Making a Samplerbox
Instructions for Samplerbox using Raspberry Pi and Pimoroni Audio Pirate LineOut
updated May 22, 2023 Glenn Meader glenn@chromakinetics.com
Feel free to contact me with any issues regarding these instructionsExtensive, detailed information on the very latest Samplerbox development is at: https://homspace.nl/samplerbox/ Note: this website is unavailable. Use the Wayback Machine to see an archive of it
Required parts
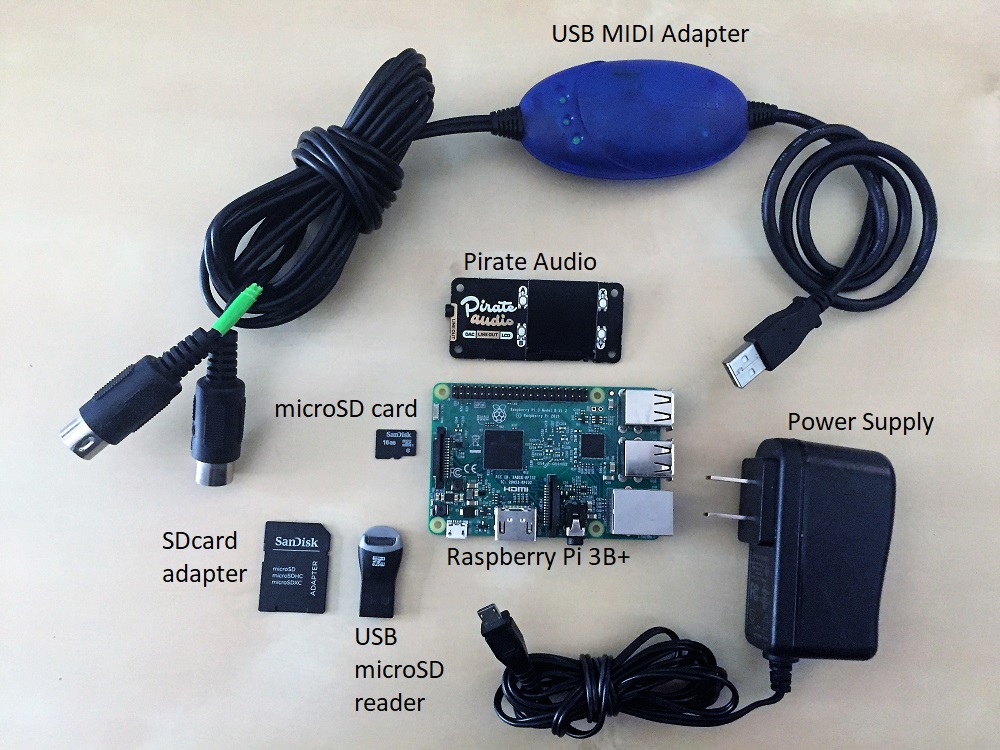
- Raspberry Pi 3B+ $35 or Raspberry Pi 4 (any memory size) (also should work on a Pi Zero 2, but these directions do not cover that model.
- Pimoroni Pirate Audio LineOut $25 Pimoroni website
- Power supply for Raspberry Pi (5V 2.5A with correct connector for the Pi model)
- MicroSD card at least 2GB (I'm using 16GB)
- a microSD card reader or microSD adapter (if your computer has a full-size SDcard slot built-in)
- a MIDI keyboard (either a USB keyboard or a 5-Pin DIN MIDI keyboard connected to a USB MIDI adapter)
Steps To Install
- Download Raspberry Pi Imager app for your computer from https://www.raspberrypi.org/software/
- Install Raspberry Pi Imager app on your computer
- Download latest version of the Samplerbox Image zip file (Sbox20220206.zip) from: Mediafire Storage
(also download some of the samples files - these contain some instrument sounds to try) - Unzip the zip file: Sbox20220206.zip into a folder on your computer. That folder will contain several files, including the Sbox20220206.img image file. (The img file is an exact copy of the contents of an SDcard.)
- Insert the microSD card into your computer/reader
- Run the Raspberry Pi Imager app. The Imager app copies the contents of an .img file onto an SDcard.
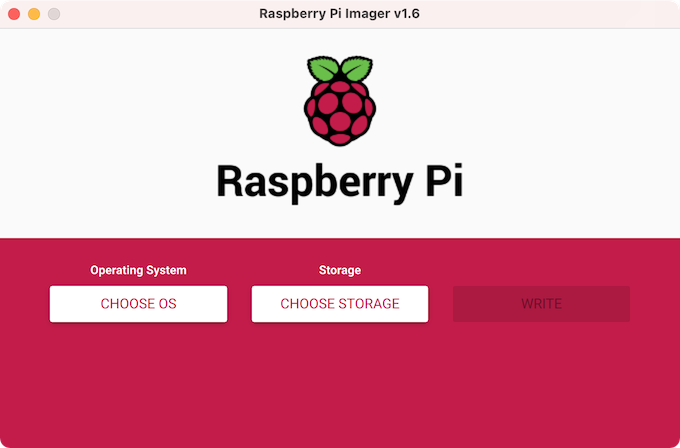
- Click on the Operating System button and choose Custom. (at the very bottom)
- Search for and select the Sbox20220206.img file
- Click on the Storage button and select your microSD card
(it might say USB MASS STORAGE, if you are using a USB card reader) - Click the Write button
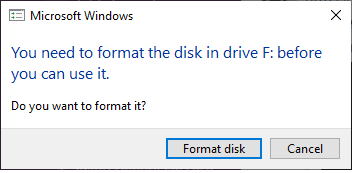
(it will take several minutes to write the image onto the SDcard) - If you see this at any point, click Cancel, do not Format
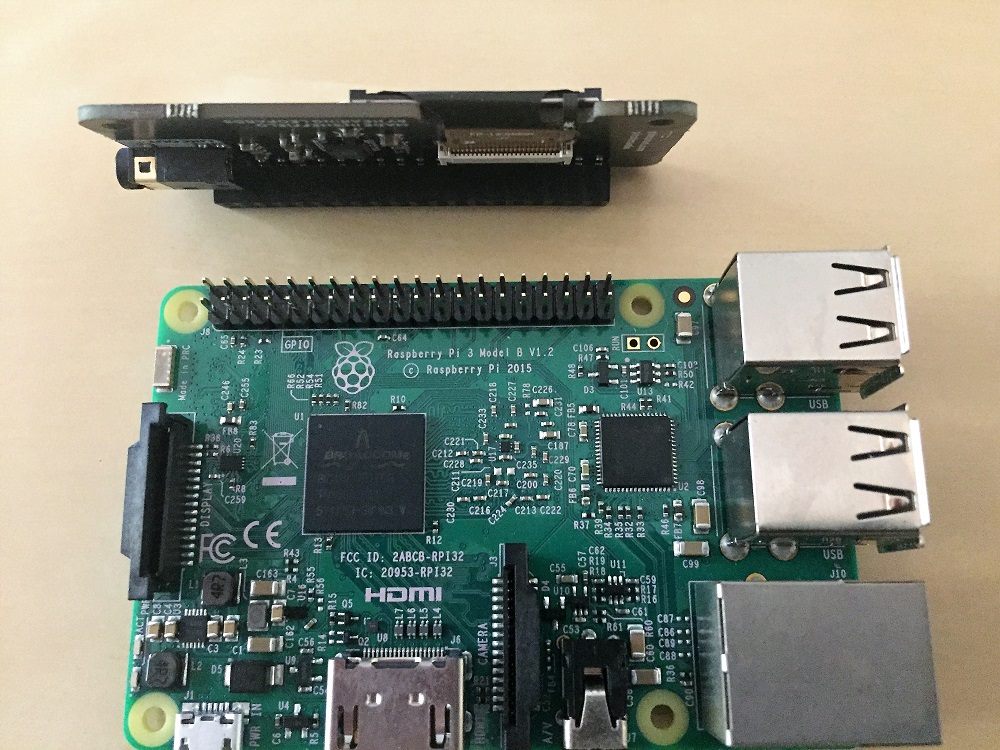
- Mount the Pimoroni Audio Pirate on your Raspberry Pi (align the 40 pin header and push together to connect)
- Now you need to download and copy three files to replace ones that are on the microSD card. The microSD card is still connected to your computer. The microSD card will appear as three new drives on your computer. You can find these drives (E, F and G in this screen capture) and files using Explorer or Finder on your computer.
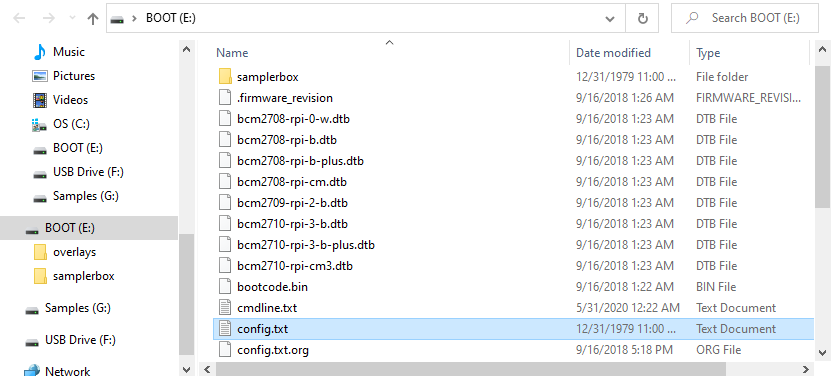
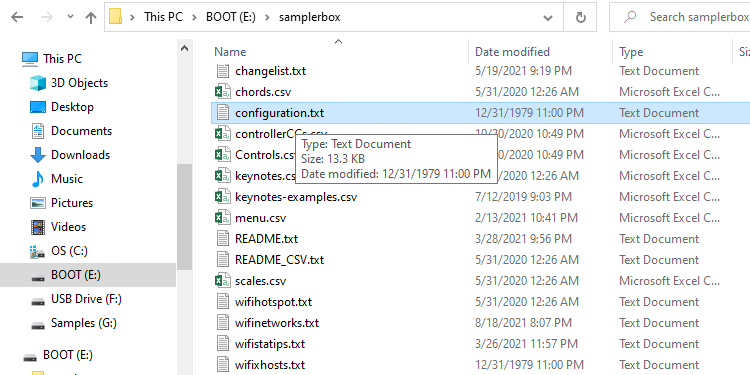
Download (right-click) and copy this file config.txt to overwrite the existing file in the root directory of BOOT (details of the changes made in this file are at the bottom of this page) - Download and copy this file configuration.txt to overwrite the existing file in the samplerbox folder. (details of the changes made in this file are at the bottom of this page)
- Download and copy this file: wifinetworks.txt to overwrite the existing samplerbox/wifinetworks.txt file, (so you can access the built-in webserver GUI in SamplerBox)
Edit the the wifinetworks.txt file. Find the following text:
network={
  ssid="ssid-name"
  psk="password/key"
  key_mgmt=WPA-PSK
}
Change ssid-name to the name of your local WiFi network
Change password/key to the password for your local WiFi network
Save the updated wifinetworks.txt file into the samplerbox folder on the SDcard.
- Properly eject the microSD card from your computer and insert it into the Raspberry Pi's SDcard slot.
- Plug the USB MIDI keyboard into one of the the Raspberry Pi USB ports
- Plug the audio output (3.5mm jack) from the Audio Pirate into an amp with speakers or powered speakers
- Connect the power supply to the microUSB connector on the Raspberry Pi
- Plug the power supply into a wall outlet
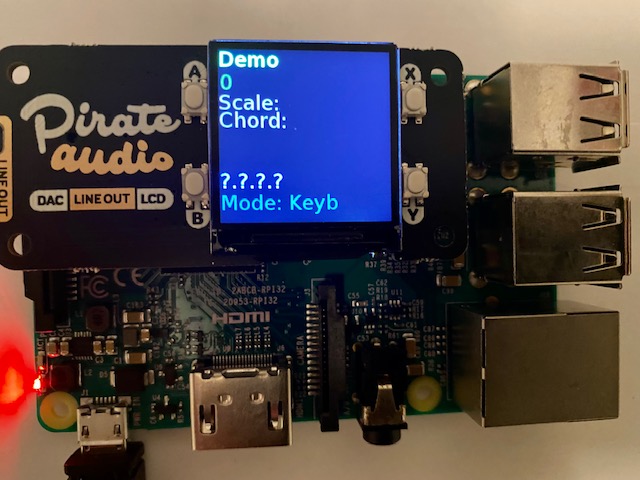
- In a few seconds the LCD display on the Audio Pirate will show some info with the IP address displayed in blue
The IP address will be something like this: 192.168.1.25
If you get 4 question marks, as in this picture, it could not connect to your WiFi network. Perhaps something is wrong with your wifinetworks.txt file.
- Now if you press a key on the MIDI keyboard, a sound should come out of the speaker.
Using Samplerbox
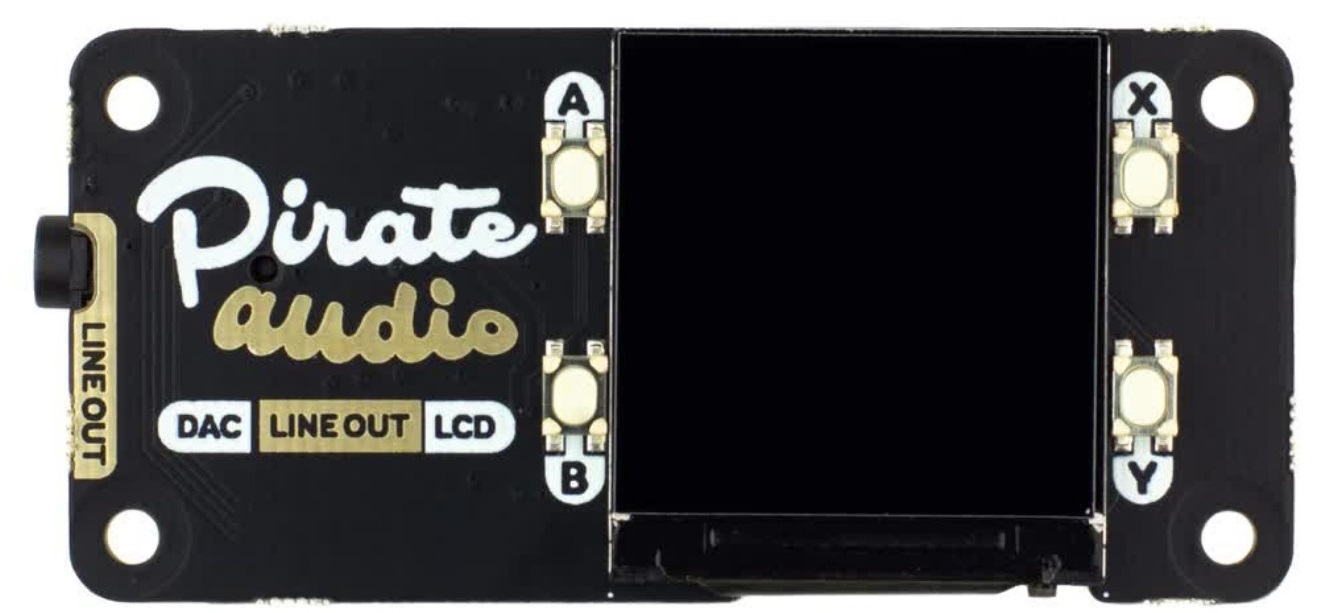
- The four white buttons around the LCD screen on the Audio Pirate are used to navigate the menus to control the Samplerbox.
Button A - Up or +
Button B - Down or -
Button X - Select
Button Y - Return to menu
- Type that IP address into a Web browser and you'll see the SamplerBox Dashboard. The Dashboard enables you to control the Samplerbox from a web browser.
More about Using Samplerbox is here: Using Samplerbox
Debugging and Customizing Samplerbox
To access the command line in the Samplerbox, open a cmd or terminal window on your computer and type this command:
ssh pi@192.168.1.25
(of course, use the correct IP address numbers for your SamplerBox.)
It will ask you for a password, which is: sbox
You will then see the Linux command prompt and you can then type in Linux commands. See Command Line for more details.
Additional Info
Adding more instrument files
A few demo instrument files (folders) are included on the SDcard on the drive named "Samples"You can access them by choosing Presets and the various Voices contained in a preset.
Additional instrument files are downloadable from this website (see the Samples menu at the top of the page).
Or you may have previously downloaded some zip files from https://homspace.nl/samplerbox/downloads/samples.
These files need to be unzipped and the folder copied onto the microSD card or a USB flash drive. Copying them to a USB drive is easier, but then you need to have that plugged into your Samplerbox to access the instruments.
Alternatively, you can copy the unzipped instrument file folders to the microSD card. But there is not enough space in the current partition on the card. First we need to expand the partition on the card to make room for these large sample files. (I'm assuming you are using a microSD card larger than 2GB. Mine is 16GB.)
This is done by giving a few Linux commands, detailed HERE
Now there is enough space for some more instrument files. So let's copy them to the microSD card.
- Power off the SamplerBox.
- Remove the microSD card from the RaspberryPi.
- Put the microSD card back into the card reader on your computer.
- Unzip each of the downloaded instrument samples zip files (Harpsichord.zip, Hammonds.zip, etc.) into a separate folder for each instrument. Make sure the folder does not contain another similarly named folder, but rather contains a bunch of WAV files. The name of each folder should be renamed to begin with a different number followed by a space. These numbers define the order the instrument "presets" will be displayed in the Samplerbox menu.
- Copy those folders to the drive named "Samples" (that is on the microSD card)
Getting apt to work
If you need to load additional Linux software into the Samplerbox, you will use the apt command. However, it might not work, because it can't find the software you want to install. This can be fixed.Use a text editor to paste the following lines at the end of the /etc/hosts file
93.93.128.193   mirrordirector.raspbian.org
93.93.128.191   archive.raspbian.org
add a new line dns-nameservers 8.8.8.8 to the /etc/network/interfaces file.
Changes made to config.txt file
The original file in the SDcard image needs to be edited to work properly with the Pimoroni Pirate Audio device. These edits have already been made in the downloadable file linked above on this page. Use a text editor to make changes to the config.txt file (on the drive named BOOT):You should see the file config.txt in the root directory of the SDcard. Edit that file and change the following lines:
1. remove the # before dtparam=spi=on
2. change this line to =off: dtparam=audio=off
3. remove the # before dtoverlay=hifiberry-dac
4. remove the # before gpio=25=op,dh (it should be gpio, not pio)
Changes to configuration.txt
The original file in the SDcard image needs to be edited to work properly with the Pimoroni Pirate Audio device. These edits have already been made in the downloadable file linked above on this page.Edit the configuration.txt file (in the BOOT samplerbox directory) to change the following lines:
  USE_BUTTONS = True
  USE_PIMORONI_LCD = True
  BUT_incr=05             ; Increase button, increases value/proceeds to next menu choice
  BUT_decr=06             ; Decrease button, opposite of above. It will return from submenu
  BUT_sel=16              ; Select button, either selects menu choice or returns to menu
  BUT_ret=24              ; Return button, returns to menu
Support for M-Audio USB MIDI devices
Here is the command to install the software needed to make USB MIDI devices from M-Audio work:
apt-get install midisport-firmware # for M-Audio USB MIDI interfaces