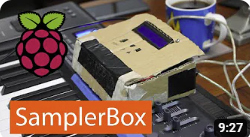
An open-source audio sampler DYI project based on RaspberryPi with goal:
A device doing the play part of a midi sampler (playing keyboards, autochord, sound effects and so on),
.. but with extra modes for playing any length samples and loops.
Playing to be done via midi devices (keyboards, drumpads, sequencers, etc..).
Device control/operation via the normal MIDI controls as well as (optional) local controls and webGUI ("App").
Sound source can be a stick containing standard WAV files with some description of these WAV's in a plain text file,
enabling the use of various sources for sounds/patches (including self made recordings).
Output either via PI builtin audio, audio hat or USB DAC (selected/added by you). All these give standard "line out" fit for audio set, headphone or stage equipment.
This has been extended with, amongst others:
Arpeggiator and autochord option
Various filters/effects
Backtracks
Quarter tones support
Detailed keyboard mapping and retuning to make it usable for mimicking "uncommon" instruments
Builtin MIDI player which can serve as a simple sequencer (experimental)
WiFi connectivity including automatic hotspot feature
Quick start
Currently Samplerbox works on Raspberry's up to PI3B+.
Problems have been reported for the Zero, 3A+ and 4. See FAQ on PI4.
Though PI1 is supported, it has very poor performance, making it unusable in most cases.
Download and burn it on a microSD card of at least 2Gb.
Several tools exist. With linux you might just use the dd command and for windows you might use
Win32 Disk Imager.
NB for windows users: this card contains three partitions,
but you cannot "see" the second (linux system) partition.
You can access the first one which keeps the necessary system configuration files (see next dot)
as well as the last one used for the internal sample space.
Configure the system.
This usually drills down to the configuration.txt only.
Depending your wifi requirements (e.g. for webgui), you need to adapt one or more wifi*txt files.
Connect your MIDI controller, sound adapter and plug the power.
After a short poweron you can start playing...
Samplerbox has a sample space with some demo-sets on the SD, which is used if you do not insert a USB-stick.
This an easy way to test the box's functionality should you get no sound with a stick inserted.
It also contains working examples with a complex definition.txt.
If your PI supports wifi, you might connect to network "SamplerBox" with password "go2samplerbox" and
navigate to "sampler.box" to have full control under your fingertips.
The rest of this site will give extensive information of all the options/usage and ways to tweak/extend.
In order to keep it a bit readable, lots of extra info is "hidden" in links or clickable images.
So if at first glance you didn't find what you're looking for, keep on clicking !
FAQ
Please see Obtaining samples, at the bottom of that page you'll find some search hints.
Features of samplerbox (loop, backtracks, release samples and more) rely on extensions
of the wav format, unsupported by mp3.
So the internal format must adhere to wav standards.
...but mentioned features are optional, so if I don't use them that's no stopper... You're right, but:
Converting of mp3 samples to wav format on load time will be possible, but would add to memory usage and sample load time.
So this is trade off between convenience when making sample sets or convenience and resources at run time.
On top of that I expect confusion = questions on the forum "I can't get this feature working".
Converting samples is easy and hey: it's DIY and free.
On current image, it does not start. This is obvious, as the hardware has significantly changed - this is also why you want to use this PI-4.
However the usual rpi-update does not help (enough).
Current approach is quite specific and hard to adapt to newer hard/software.
For my PI-4 I'm working on a different approach which should have less compatibility issues.
It looks promising, but is quite an effort: relax & stay tuned...
For the other models: for the 3A+ I received an unconfirmed signal it worked after an rpi-update.
In general: I hope most will be covered via the different approach.
I know of four published/documented ones and will explain/link to those in order of appearance:
That's not OK, but some more diagnose information is needed as it usually works.
Items you might check (you may have to start in debug mode):
Did you test without a stick = with the shipped demo ?
Your stick, or the samples on it, may have problems (see next FAQ).
Is your midi controller correctly opened at script start?
Is the SB's midichannel equal to your controller's transmit channel?
Does the SB receive the note-on/off commands? (you can use the midimon.py for that)
Is the desired audio dac openened correctly at script start?
By default samplerbox tries to autodetect your hardware
- this may have failed (note that I am interested for improvements sake..)
- this may have been overridden in the configuration.txt in an incorrect way.
Is the sample set loaded correctly (= not empty or having alarming messages)?
Common causes for having an empty sample set, while having wav's in the directory:
- errors in the wav names and corresponding patterns - wav's having other bitrate than 16 or 24
- wav's being unreadable or having unrecoverable errors (though samplerbox is very forgiving..)
Please have a look at next FAQ regarding multiple USB storage devices!
And ofcourse the obvious: are all cables connected, power and volume turned on, etcetera ? .... :-)
If you still can't find it, refer to the for help.
You may have found a bug, please describe your observations, even the ones seeming unrelated.
There may be issues with the format:
It may be formatted with blocks of 8KB: reformat with a block size of 4KB and it should work.
If that's not the case: please read the first dots of Some goodies on the build-it page.
Or just try another stick...
Samplerbox supports only one USB storage device and you may unintentionally be using USB storage for other purposes.
See "Single-board microcontrollers" in Making other types to fit your requirements on the build-it page.
Samplerbox logic is: use attached USB stick/drive and if not present, use the internal space. The presence and contents of USB device is checked at startup and with the "new usb" GUI button.
The image is limited in size to ease distribution with a samples partition of 128Mb, only fit for a limited demo/test.
You can enlarge this partition and subsequently store your samples there, avoiding a USB stick/drive.
Enlarging within the samplerbox is explained in the build page.
But you can use your PC too using your favorite disk partioning program. Filesystemtype must not be changed!
Filling/changing the contents can be done via either:
- Inserting the SD in a PC and mount the last partition to do your things..
- Starting the box normally
- Remount the "/samples" in rw mode directory see Commandline access and debugging.
- Access the box via an sftp program (= using the ssh-protocol) and do your things..
- Remount "/samples" in ro mode, or (better) reboot (any way, don't just poweroff!)
Please read about multi timbral devices in "More info".
If you own a keyboard with drumpad sending on the drumchannel=10 and which be reprogrammed
to use the master channel, you can keep this pad as part of the master keyboard by using the
Keyboards with drumpads technique.
This can be handy if you want to use the pads as controller buttons -
but do read the referred paragraph and 2 subsequent paragraphs as it is a bit complex.
In general you can always stop via "all-notes-off" controller button if you've defined that (you should!).
Having said that: possible causes of this behaviour might be:
Using a loop mode but you can't give the extra keypress (either same note or 127-note). Can happen if you use "127-note" but this note is not on your keyboard, or having switched to another keyboard map where the needed note is not defined.
When a played note-off was missed by SB. This can happen because of CPU problems. See the "Clicks and plops" FAQ.
Some older midi keyboards do not adhere to the MIDI standard of sending either "note-off" or "note-on with velocity=0".
An example is Roland PT-3100. This particular issue has been solved with a hack, which is commented out in the normal distribition.
If you look for "Roland" in the midi callback routine, you'll find an example on how to deal with such things (it may not be that simple though..). Obviously such hacks introduce compatibility problems when connecting standard midi devices.
Usually this is because of input volume of DAC being too high. In general input WAV's should never be louder than -6dB. However: Other items having impact:
Nature of the instrument, some instruments or more critical than others.
Specifications/internals of the DAC.
Velocity of playing (strength, force, dynamics....).
Number of notes played simultaneously. Keep in mind that each pressed key results in 3-4 or more notes when using autochord and/or chorus (a 4-note chord played with chorus will result in 4x3=12 actually played notes).
Extra's like playing backtracks.
Effects being used: reverb, delay/echo and moog filter can add extra sound/volume
Bottom line: a safer value would be -12dB. If your editor does not show dB's: -6dB usually shows as 50% or 0.5, -12dB shows as 25% or 0.25 etcetera.
Adapting all WAV's is tedious, so you'd better use the %%gain or %gain parameters. I prefer %gain as these issues are sample related.
The box has a peak limiter implemented, which can be turned on to make life easier. However it's still recommend to tune the volume reasonably well
as continuous limiting will negatively impact sound quality - it's meant for peaks only.
Please also read Controlling the volume as input volume is not the only link in the chain.
Next FAQ about clicks&plops closely relates to distortion.
This can be either be plain distortion (see previous FAQ) or CPU issues.
CPU issues can arise when playing very fast (much note-on/off - think of the multiplication of notes when using autochord and/or chorus).
The table in Effects & audio filters gives a full overview of the effects and related CPU impact.
Please note that new versions are developed on PI3B+ without testing on lower hardware versions.
Also note there is a relation with setting blocksize to a low value (see the "sample rate" FAQ).
Last but not least: using GPIO (e.g. the hardware buttons) hijacks CPU cycles; it is advised to operate the buttons during silence.
As a rule of thumb, the latency between different musicians who want to play together should be <25-30ms.
Even without any electronics, there will always be some latency as the speed of sound is relatively low.
The latency of two (acoustic) musicians standing 5m away from each other would be already 5m / 343 m/s = 0.0145s = 14.5ms.
Samplerbox adds 10-14msecs to this when using the distributed image with its default values.
The "variable part" 0-3+ msecs is due to speed of play and usage of (auto)chord, chorus, release length and play mode.
The "fixed part" of 10+ msecs can sometimes be optimized depending on the DAC and the way you play:
The configuration.txt has a BLOCKSIZE parameter, which is default set to HIGH as this is a safe value which usually is good enough
This way we have no distortion side effects resulting from working with lower blocksizes (=higher speed of sound synthesis).
But you might try LOW (takes the lowest possible value for the DAC). If this works, have a beer.
If this gives nasty side effects (try fast play with the sound effects you normally use turned on), you may have to detail the value into a number.
Use debug mode to see the startup message giving the valid blocksizes and experiment with them..
If you use the builtin DAC (HDMI or audio plug) the blocksize parameter is ignored: despite the docs only HIGH works correctly.
Setting the sampling frequency to 48000 instead of 44100 also affects the blocksize (so same implications), giving an improvement of somewhat less than 9%.
However, here are some more implications, please read next FAQ about samplerrate.
Some considerations as there is more than above internal technique:
When not using SB in standalone mode (= the distributed image) but on a full OS instead, there will be too much other processes interfering. As I develop on full Debian, I can confirm this causes serious latency :-)
If the samples have a (short) silence in the beginning, this will result in latency.
==> This is a common cause of complaints and needs truncatation of the actual WAV's.
You can hear the difference in the grand piano versions found in the samples folder of the .
See various corrections on samples for a solution.
Most instruments have some latency by nature via their attack curve - the attack peak is not at the attack, but somewhere after.
So though you will measure the peak after the note-on event, it won't hurt actual playing. Extreme examples are accordeons, harmoniums and church organs:
the pressure needs to build up and we even recognize such instrument via this behaviour.
However, when playing at low velocity, this gets more extreme. This is a technical issue on my wishlist, stay tuned...
It can also be somewhere else in your setup. The forum reports 45msecs latency solved by changing the midi routing in that complex setup.
Samplerbox uses 44100Hz by default and will try to set the DAC accordingly at startup.
You can set this to another value in the configuration.txt.
- No, this can't be changed on the fly -
The original and still used WAV standard is 44100Hz.
Thus the majority of WAV samples are 44100Hz. If you want to make samples from other formats (mp3 etc..), you'll have to convert anyway.
The WAV and the DAC must have the same rate to avoid a consistent out-of-tune situation, however:
If you want to use 44100Hz samples and have a 48kHz DAC which can't be set to 44100, you can use the "USE_48kHz=True" setting to correct this mismatch.
This is a bypass via a "permanent pitch bend" giving a slight quality loss, so try to reconfigure the DAC to allow for 44100.
Principally 48kHz is higher quality as it's a 9% granularity difference. I can't confirm hearing that myself when playing.
So if you have 48kHz samples, you might opt for using 48000 in the configuration.
Using 48kHz speeds up the audio callback frequency and this will increase the overhead of the function calls used in there.
As this audio callback is the heaviest burden on the CPU usage, this will increase the risk of the famous clicks and plops.
Bottom-line: you'll have to check yourself what's the best choice in your case.
To start of with the donations:
This is strictly a hobby project for me and since I have a steady day-time job there is no need for donations.
But still many thanks for considering it !
Other contributions are very welcome and may have various appearances:
Feedback of errors as well as things that could be better
Ideas for new functions or extensions/improvements of existing ones
Coding for the above, preferably, but not necessarily, via GitHub pull
Or just hints/links for some inspiration
You can use the for communication.
Since you can supply your mailaddress there, we can even start a mailexchange via the normal way.
For spam reduction I don't want my mailaddress on the site - that's all.
And obviously, GitHub was made for exchange.
It may be covered in the links of the "Quick start" above (maybe dig a layer deeper).
You can also try the More info page .. plus the rest of this site.
If you're still stuck, please refer to the for help.

 Features of samplerbox (loop, backtracks, release samples and more) rely on extensions
of the wav format, unsupported by mp3.
So the internal format must adhere to wav standards.
Features of samplerbox (loop, backtracks, release samples and more) rely on extensions
of the wav format, unsupported by mp3.
So the internal format must adhere to wav standards.
 I know of four published/documented ones and will explain/link to those in order of appearance:
 That's not OK, but some more diagnose information is needed as it usually works.

 Usually this is because of input volume of DAC being too high. In general input WAV's should never be louder than -6dB. However: Other items having impact:
 As a rule of thumb, the latency between different musicians who want to play together should be <25-30ms.
Even without any electronics, there will always be some latency as the speed of sound is relatively low.
The latency of two (acoustic) musicians standing 5m away from each other would be already 5m / 343 m/s = 0.0145s = 14.5ms.
As a rule of thumb, the latency between different musicians who want to play together should be <25-30ms.
Even without any electronics, there will always be some latency as the speed of sound is relatively low.
The latency of two (acoustic) musicians standing 5m away from each other would be already 5m / 343 m/s = 0.0145s = 14.5ms.
 Joseph,
 It may be covered in the links of the "Quick start" above (maybe dig a layer deeper).